Wednesday, March 27, 2013

Outfit that turns to a scrapbook layout into a gift idea.

I made this scrapbook page to match the outfit to give as a gift.

I took a close up picture of the animals on the outfit, printed them out in color and then used some scrapbook flock to enhance them a bit and used them as the embellishment on the layout. I can't wait to do this again, flock is really fun to work with (and really easy too) (seriously, glue, drop, shake - wait to dry).

Tip:  set up and let your flock dry PRIOR to cutting the image out.  It is much easier to flock that way and also you will get a cleaner edge/cut of your image.


And here is the finished product with the picture on it.  The funniest part of this, is that Katie had been planning to complete this layout at a scrapbook retreat we were on and she had been planning the perfect set up... meaning I was still setting up my stuff and she finished a complete layout in that time, she was laughing to herself the whole time and then shouted "I've finished a layout!!!"  I guess I was a bit crusty in my response seeing as how I hadn't even started anything yet which makes us laugh even harder now because I was bummin that I hadn't even started yet .... but looking back on it now... it's HILARIOUS!!!!  Sorry Katie ;) 

Monday, March 25, 2013

Here are some goodies I've made for a baby shower for next week. The mother LOVES yellow... and LOVES butterflies.... so here is my interpretation.

Diaper butterflies


Ginormous diaper butterfly (yes it's all diapers and 3 scrubbies for the body)


Some baby girl socks I crocheted beads around for some fancy socks :)


these started out as plain onsies, I cut vinyl on my cricut to make a template and then painted them with fabric paint


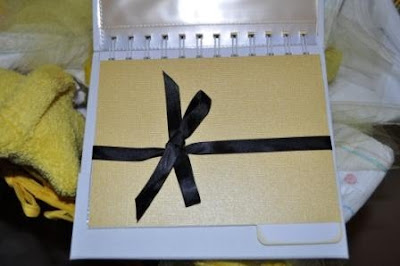
Here is a mini album for her to carry around with her.
I didn't over embellish the inside becuase it was getting too thick and it didn't have any pictures in it yet...LOL so I just added some color to the tabs.


Here is the gift basket so far, I have one more flannel blanket to add and then will just pull it all together, Mikayla also made a butterfly to go in the basket as well so that'll be in there too. I hope I remember to take a final picture LOL

Wedding Gift: word scramble

We have some friends that are HUGE board game players so I knew I wanted to incorporate their love for games into their wedding gift.  I came up with the idea to frame a word scramble (that was unique to their life) that could also double as home decor.  On the opposite side of the frame I used scrabble letters in the shape of a cross that spelled "Love You."  I also wrote their wedding date on the scrabble tiles.  (1-14-2012)

There are 18 hidden words in this scramble!  I used red ink for their last name so it stood out from the other letters. 

The hidden words are:
  • Amy
  • Andrew
  • Lilly (their doggy!)
  • Husband
  • Wife
  • Wedding
  • Ring
  • I do (2 times!)
  • Love (2 times!)
  • My
  • Best
  • Friend
  • January
  • Fourteenth
  • Twenty twelve
  • TX
Scrabble tiles........

Friday, March 22, 2013

John Deere Taggie Blanket

I made this John Deere taggie blanket several years ago.  I don't have pictures of the progress but I followed this tutorial and it was super simple.

Baby Shower Gift: stuffed baby

One of my favorite baby shower gifts for an expecting mother is a "stuffed baby!"  The babies can also double as decor if you're the hostess!

Supplies:
  • Footed pajamas (or a 3 piece set that has a hat and booties)  I usually buy a 3 month outfit so there is enough room to "fill" the baby.
  • Hat, if not included with outfit
  • cloth diapers (5-6)
  • tissue paper
  • pins
  • tulle- 1.25 yards
  • base for the baby to "sit" on (round hat box, bottle drying rack, charger, etc.)
  • 5-7 items from mommy's registry (I typically try and get body wash, pacifiers, diaper ointments, etc. Items that are sturdy and "stand up" are best!)
Stuff the baby's legs with cloth diapers and then fill the "body" with registry items. 

Stuff baby's arms with tissue paper (I used colored tissue for this baby and let it stick out a little.)  After you layer all registry items in the "body," stuff/lay/wrap the items with tissue paper and cloth diapers so that the baby is somewhat smooth.  Snap the outfit closed.

The head is the hardest part for me and it usually requires a repair or two after transport to the shower.  I crumble plastic grocery sacks (or tissue paper) into a ball and then wrap the ball with a cloth diaper.  Use pins to secure the cloth diaper together and then pin the head to the baby.  Add the hat (it usually stays on without pins).

I like to find a cute box to sit the baby on...this one happens to have something inside the box too!  Sometimes I'll accessorize the baby with a pillow, toys, etc. but not always.

Gather the tulle around the base and baby and secure at the top with ribbon and a card.  (I always secure the tulle with a rubber band before wrapping ribbon around it since that seems to keep it all together.)  Pulled tight, the tulle will help keep the baby sitting upright.
 

Here is a little froggy baby that I made for a gender neutral party.  This was a 3-piece set rather than footed pajamas and it worked great!

Same steps....


The mommy-to-be registered for a drying rack that worked perfectly for the baby "base!"


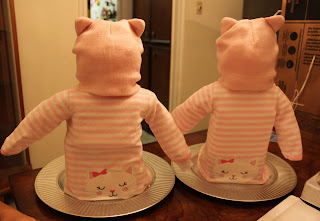
The most recent set of babies I've made were for a friend having twin girls.  I learned that a hat with a face on it is SO much easier than trying to balance a baby head and hat!  Plus, these kitty hats are to die for!

Check out those little bottoms!

Wrapped in tulle and ready to go!  (I couldn't find a good base for these babies so I bought two chargers...they worked perfectly!)
The funniest part about the stuffed baby gift is that I always always always feel like I need a "disclaimer bag."  Basically it's the bag with all of the tags from the clothes, cloth diapers, anything else I needed to open so that the mom knows I bought it all new.  It's become quite the little joke!